A "[repository](https://en.m.wikipedia.org/wiki/Software_repository)" is the location that your software manager searches for available software.
Using the repository on your USB flash drive as the default may cause errors when trying to install software that is not locally available. In order to disable it, we need to open the [Synaptic Package Manager](https://en.m.wikipedia.org/wiki/Synaptic_(software)). This program is a visual interface for installing software and managing repositories that is available by default on Debian. When we open it from the Start Menu in the bottom right and navigate to "Administration", and then the program "Synaptic Package Manager". [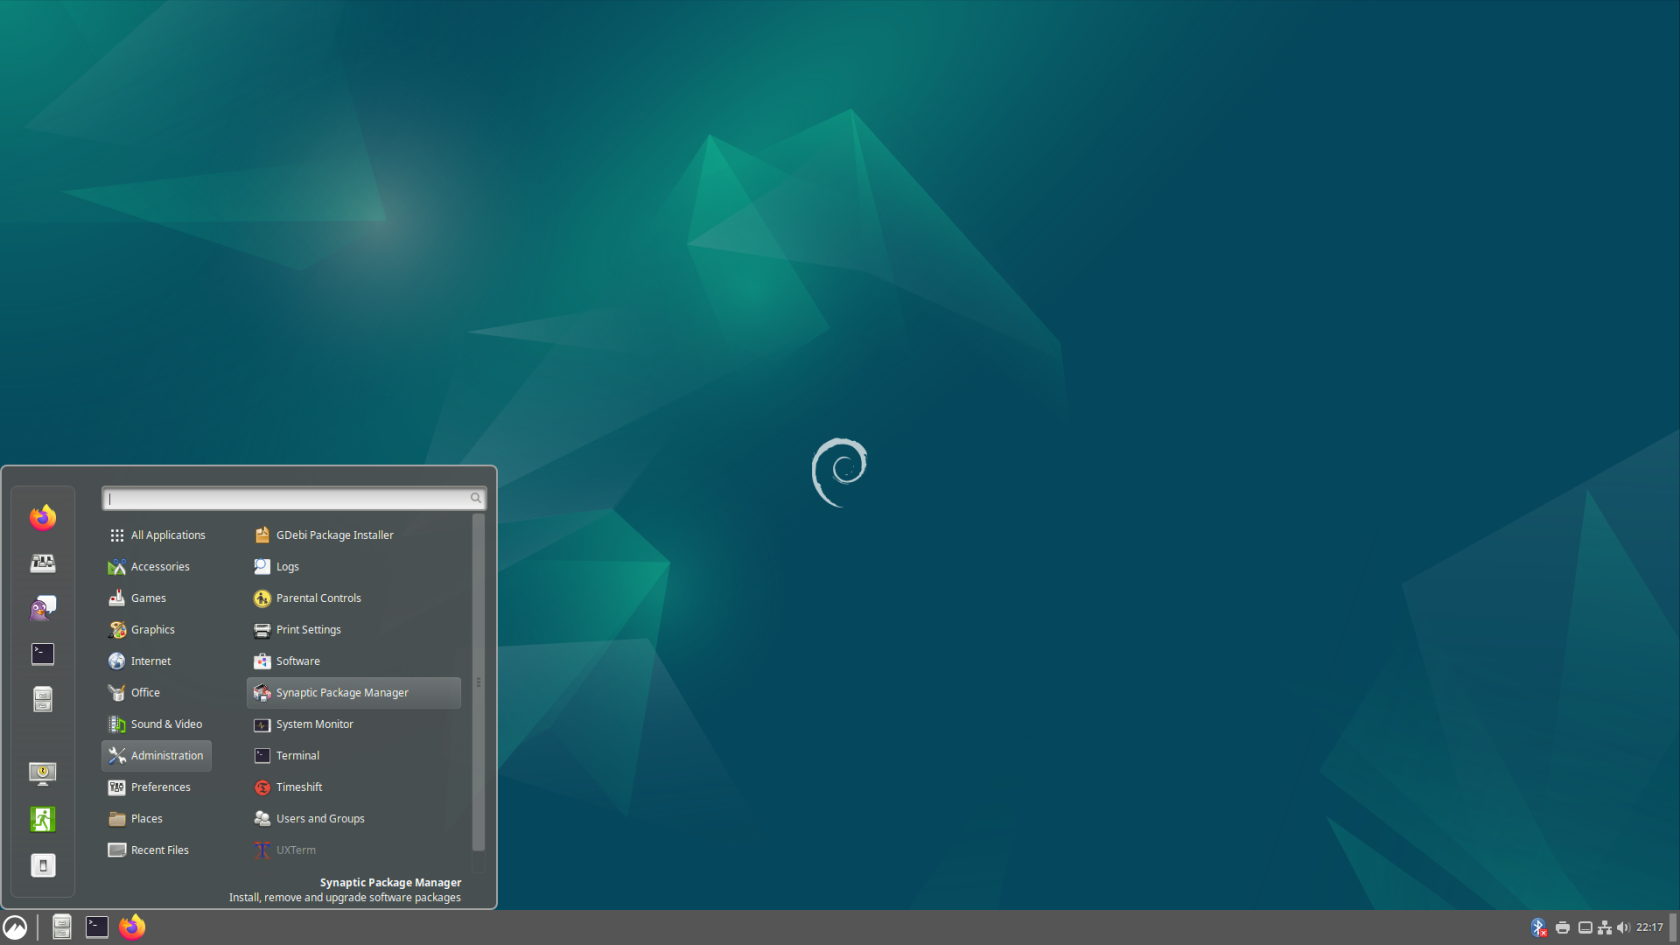](https://hub.subspace.services/uploads/images/gallery/2025-04/screenshot-from-2025-04-14-22-17-39.png)You will need to enter your account password.
Opening this program will ask us to end the password for the root user account that we created during the [Debian installation process](https://hub.subspace.services/books/software/chapter/installing-an-operating-system "Installing an Operating System"). [](https://hub.subspace.services/uploads/images/gallery/2025-04/aXKimage.png) After we enter the password and open the program, we will be prompted with a help prompt that we can close. Now, we are presented the Synaptic Package Manager that is used to install software. [](https://hub.subspace.services/uploads/images/gallery/2025-04/YeEimage.png) We are using Synaptic to change the Repositories used by this computer. Under the "Settings" menu, select "Repositories". This will open the "Software & Updates" window. We need to go to the "Other Software" tab and deselect the "**cdrom:**" entry. [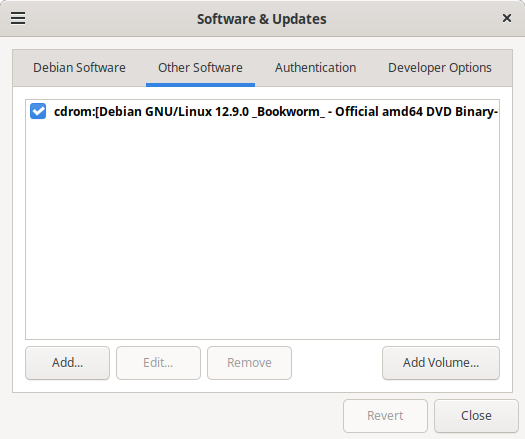](https://hub.subspace.services/uploads/images/gallery/2025-04/4Msimage.png) Once the option is deselected, it will prompt you to reload repository information so it knows what programs are available for download. [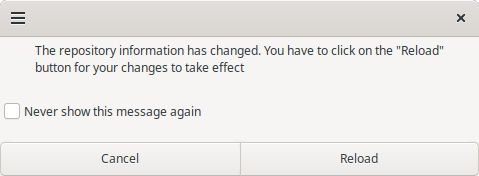](https://hub.subspace.services/uploads/images/gallery/2025-04/9NKimage.png) Once you do that, the system may request to update your repository because it is out of date. This will ensure that you are installing the most up-to-date software. # Administrator Permissions On Debian, our user account cannot run commands as Root through the terminal. We will be changing this for simplicity sake, allowing us to prefix commands with 'sudo' to run them as if they were run by root.Skip this step when using a Raspberry Pi.
We need to open the Terminal application from the side bar of the start menu. [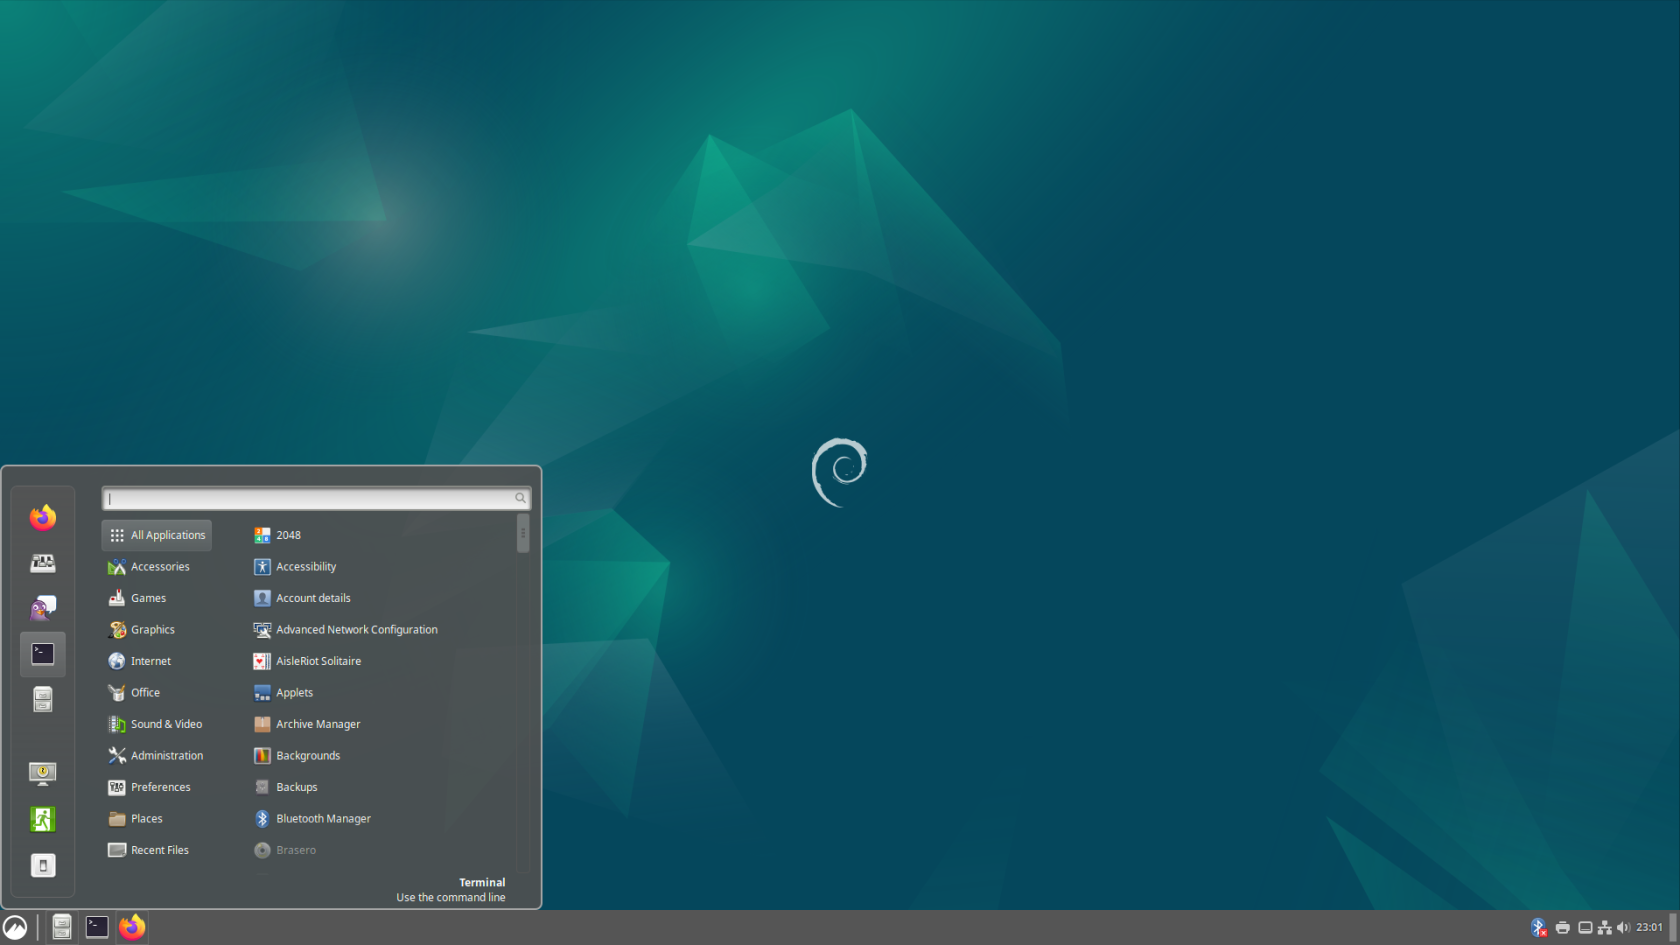](https://hub.subspace.services/uploads/images/gallery/2025-04/screenshot-from-2025-04-14-23-01-20.png) By default, we need temporarily "[substitute users](https://en.m.wikipedia.org/wiki/Su_(Unix))" to perform commands as root. Enter the command: ```bash su root ```| [](https://hub.subspace.services/uploads/images/gallery/2025-04/MEGimage.png) | [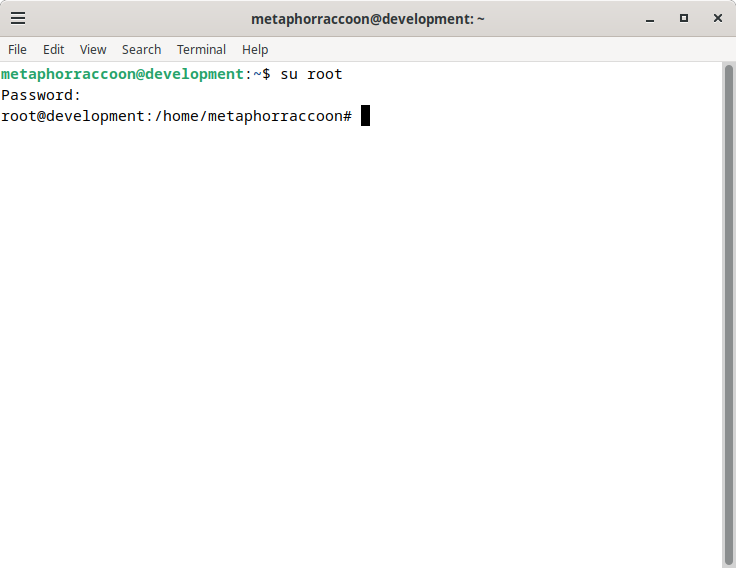](https://hub.subspace.services/uploads/images/gallery/2025-04/Ihpimage.png) |
When you are typing a password through the terminal, it will not display that you have typed any characters.
Now that we are acting as the root account, we can configure our user account to have the permissions to run all these same commands. We will be using an application called "visudo" This command ensures we cannot break permissions on our computer.Learn more about [visudo and the sudoers file](https://www.digitalocean.com/community/tutorials/how-to-edit-the-sudoers-file).
Enter the command: ```bash sudo visudo ```| [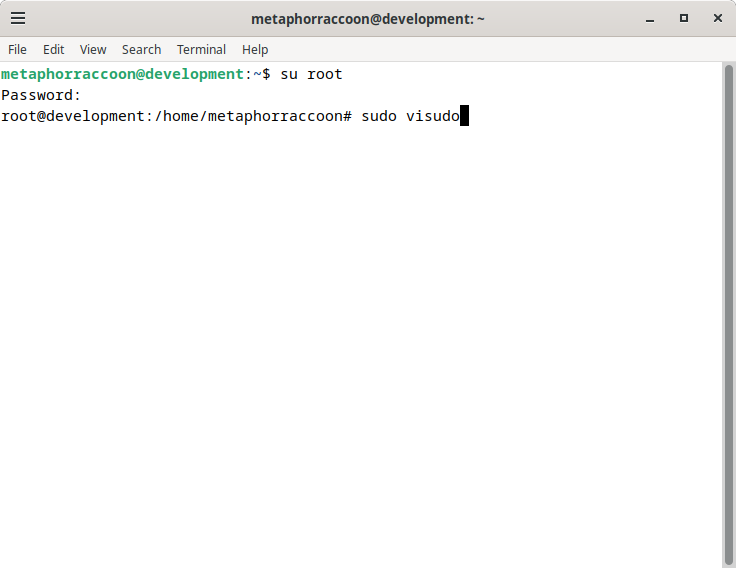](https://hub.subspace.services/uploads/images/gallery/2025-04/CA2image.png) | [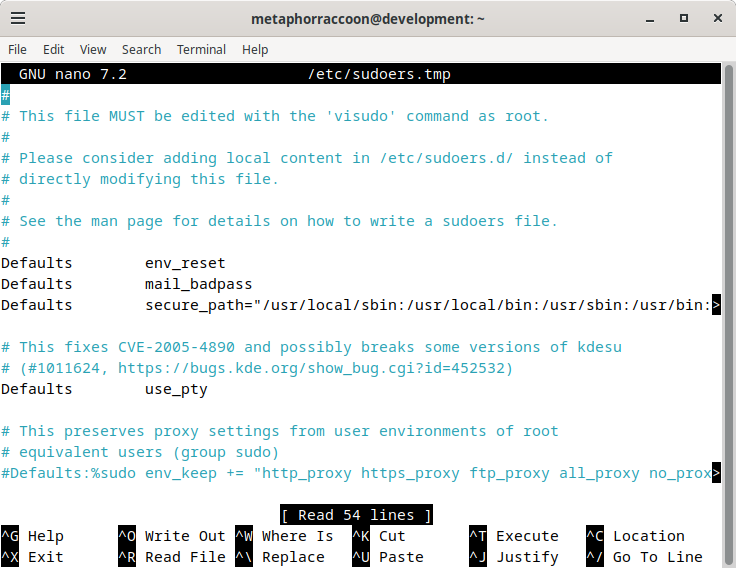](https://hub.subspace.services/uploads/images/gallery/2025-04/Nsoimage.png) |
| [](https://hub.subspace.services/uploads/images/gallery/2025-04/0Ttimage.png) | [](https://hub.subspace.services/uploads/images/gallery/2025-04/R43image.png) |
**Re-install all disk drives.** Make sure to shut down your computer and re-connect any disk drives that were unplugged during the Debian installation.
While Debian can support writing to NTFS disks using the [ntfs-3g](https://www.tuxera.com/company/open-source/) software, it can [decrease overall performance and access speeds](https://en.wikipedia.org/wiki/NTFS-3G). FAT and ExFAT file systems have native support within Debian, but are not an ideal server file system [due to technical limitations](https://support-in.wd.com/app/answers/detailweb/a_id/51807/~/pros-and-cons-of-file-systems-used-with-memory-cards%2C-usb-flash%2C-internal-and). If possible, important data should be copied to an alternate disk so that it can be reformatted as ext4.**Reformatting will erase the disk drive.** You will irrecoverably lose data stored on this drive.
[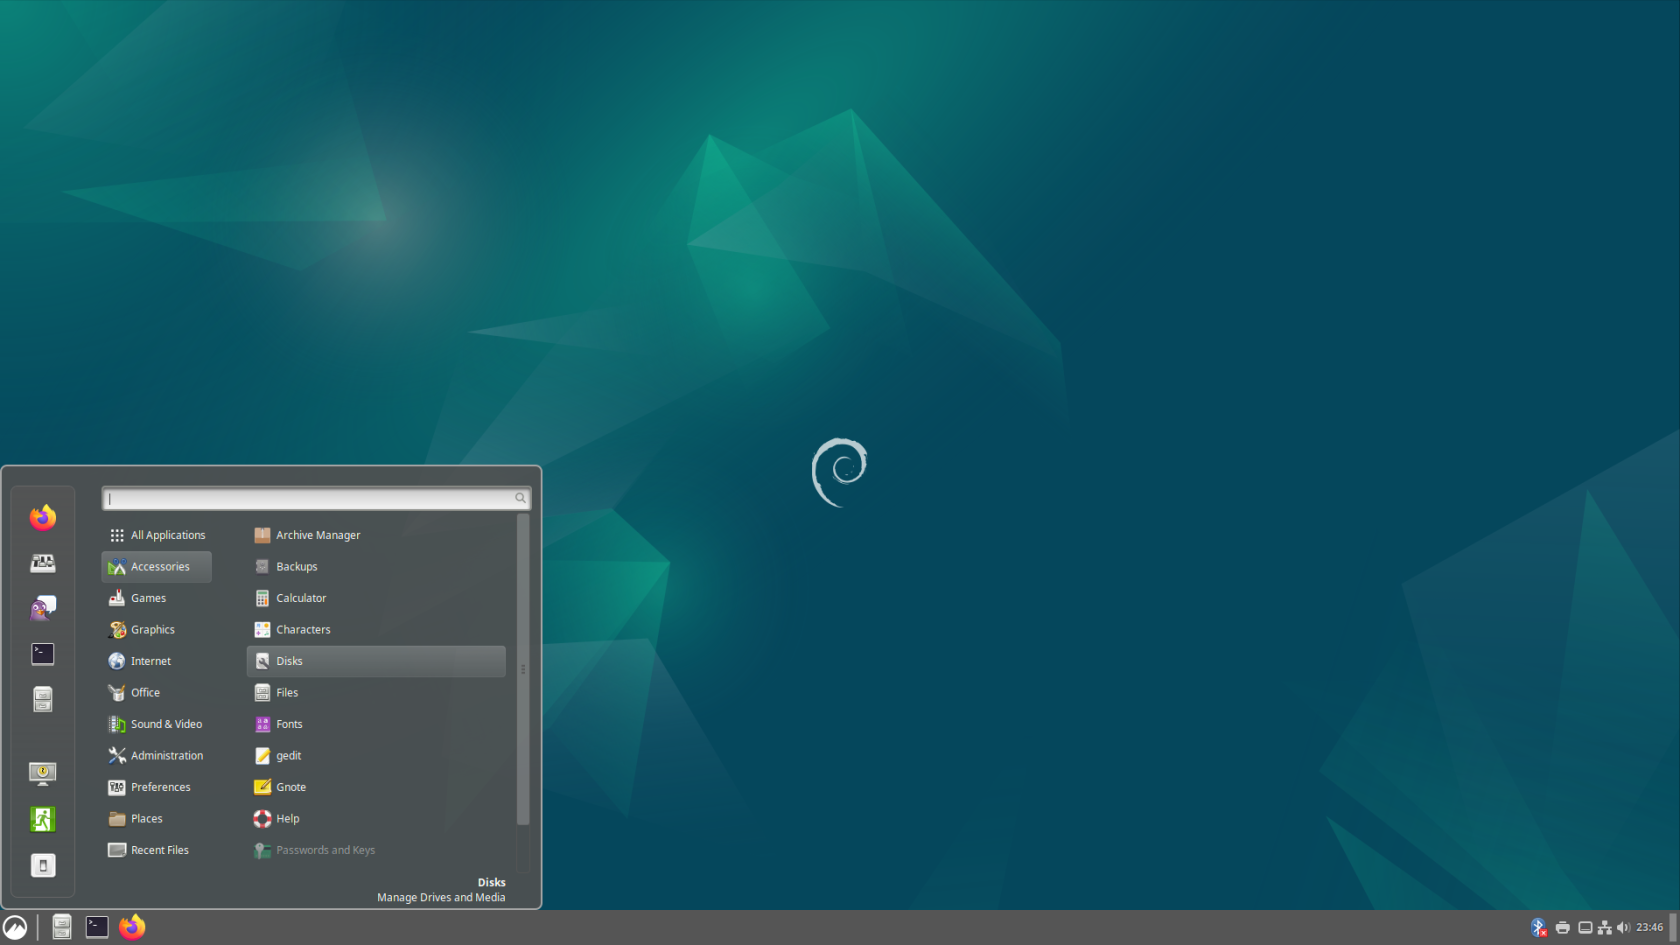](https://hub.subspace.services/uploads/images/gallery/2025-04/screenshot-from-2025-04-14-23-46-56.png) We will be opening the "Disks" application from the Start Menu, under the "Accessories" category. [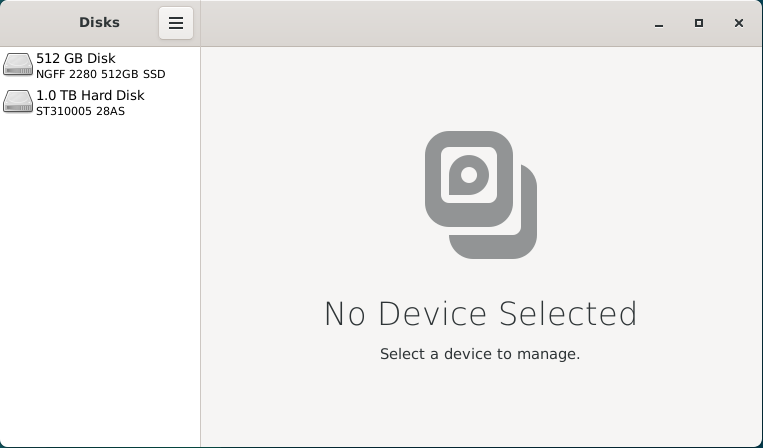](https://hub.subspace.services/uploads/images/gallery/2025-02/invimage.png) This application can be used to verify that the disk is formatted using the FAT, ExFAT or NTFS file system. Once we've done that, we can format the disk drive using the Linux ext4 file system for improved performance and reliability. When we select on the 1.0TB hard drive listed, we will see an overview of the partitions on this disk. There is a small 210MB EFI partition used for system files and a 1000GB partition that takes up the rest of the space. We can also see that the "Storage" partition is formatted using the NTFS file system. [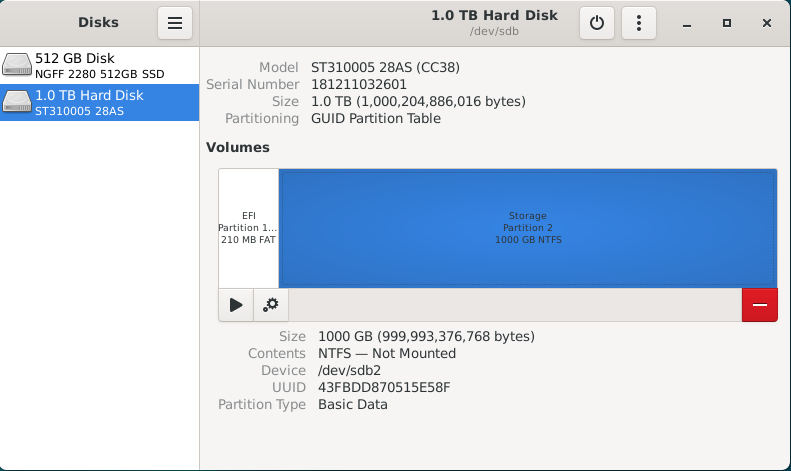](https://hub.subspace.services/uploads/images/gallery/2025-02/JqKimage.png) With the Storage partition selected, we select the red 'minus' icon to 'Delete selected partition'. We will receive a warning that all data on the partition will be erased. Once you are certain there is no important data on that partition, you can hit 'Delete'. [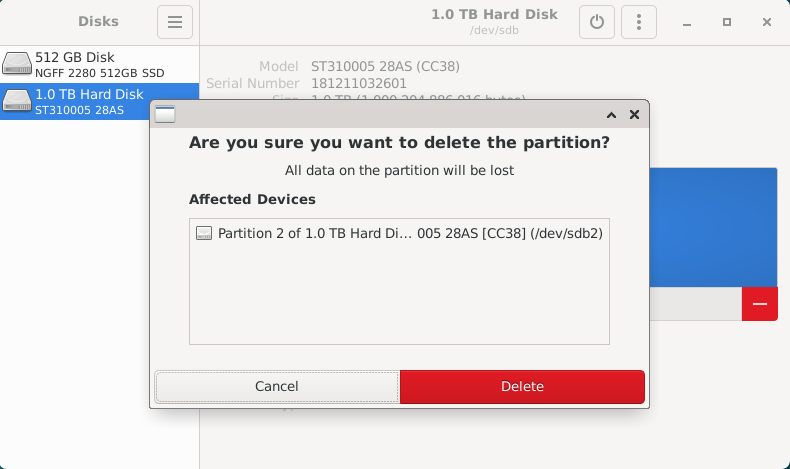](https://hub.subspace.services/uploads/images/gallery/2025-02/Iuzimage.png) If there are other data partitions, aside from the EFI partition, we will need to follow this process to remove them. After all the partitions have been removed from the disk, you will be presented with 1000GB of "Free Space" for us to create a new partition. [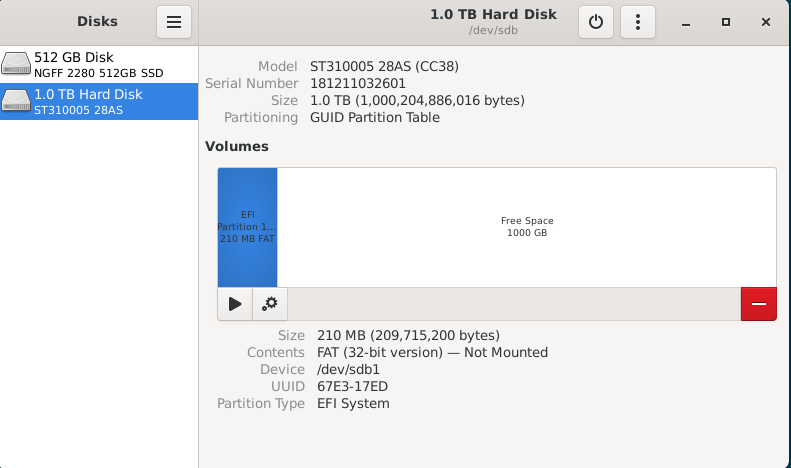](https://hub.subspace.services/uploads/images/gallery/2025-02/iJ9image.png) By selecting "Free Space", we are presented with a 'plus' icon that allows us to "Create partition in unallocated space". [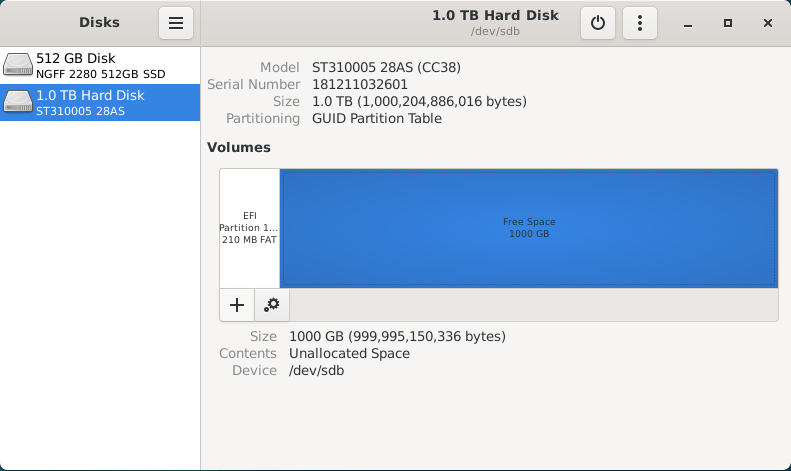](https://hub.subspace.services/uploads/images/gallery/2025-02/lBDimage.png) Clicking this button will open a partition creation wizard. First, we need to select how much space the partition will occupy. For this disk, we want the partition to fill the entire space so we will leave it at the default setting. Hit 'Next'. [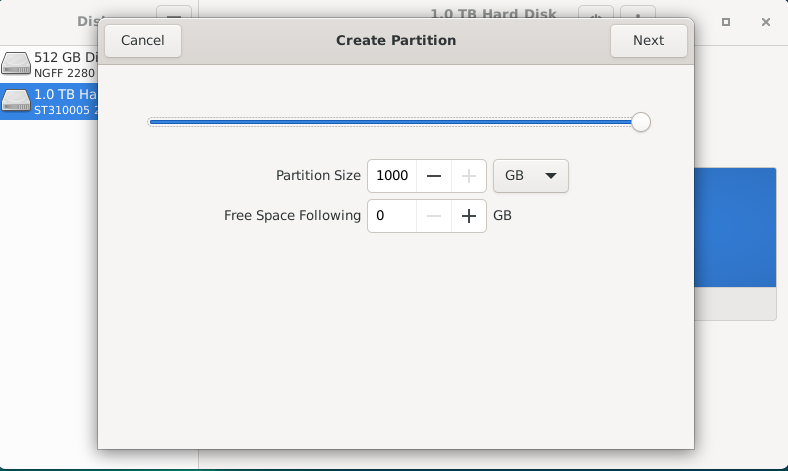](https://hub.subspace.services/uploads/images/gallery/2025-02/MV5image.png) Now, we will need to give a name to the partition and choose the file system type. This name can be anything you want, but simple descriptive language is usually best. We will name the partition "Storage" and choose the Type "Internal disk for use with Linux systems only (Ext4)". Optionally, you can choose to securely write over all the data that was stored on the drive. We do not want to encrypt our volume with LUKS. [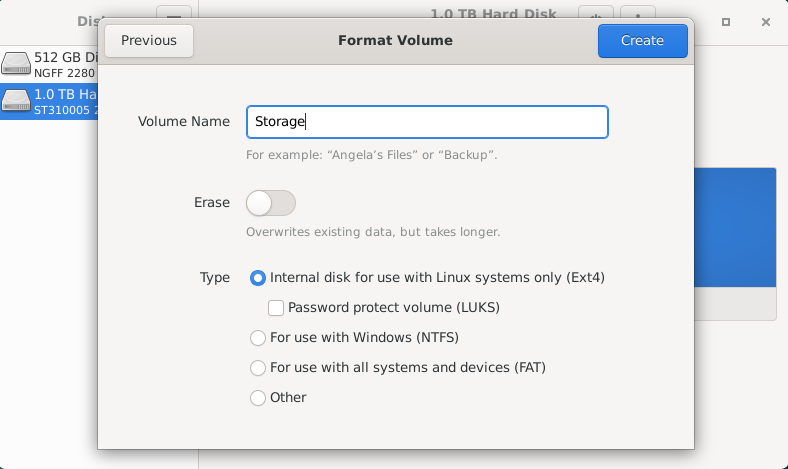](https://hub.subspace.services/uploads/images/gallery/2025-02/zfFimage.png) Once we hit 'Create', it will begin to format the disk with the new partition. [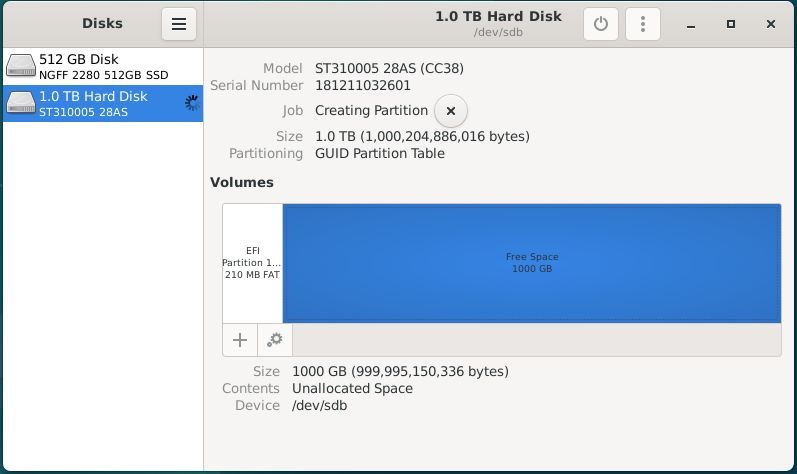](https://hub.subspace.services/uploads/images/gallery/2025-02/K6Pimage.png) Once it's completed the format process, you will have a new 'Storage' partition using the Ext4 file system. [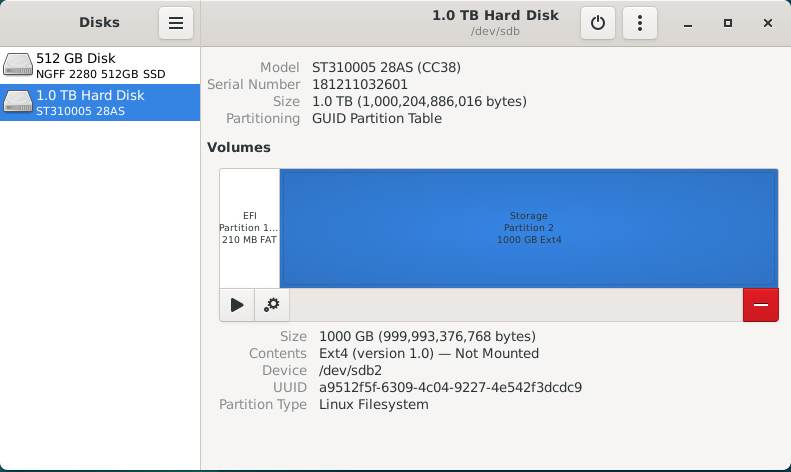](https://hub.subspace.services/uploads/images/gallery/2025-02/ns4image.png) Now, we can move on to mounting these storage disks at a permanent and centralized location. ## Mounting Drives While running a personal cloud or media server, you may need additional hard drives to store movies, television or documents. Whether you are using a USB hard drive or installed a new NVME SSD, they will need a fixed location for accessing their files. By default, internal drives are mounted within the /mnt folder while external hard drives are mounted inside a user folder within /mnt. We need to explicitly mount these disks so that they don't change unexpectedly between system reboots. For simplicity, we want to ensure all of our storage disks is permanently mounted within the /mnt folder. [](https://hub.subspace.services/uploads/images/gallery/2025-04/screenshot-from-2025-04-14-23-46-56.png) We will be opening the "Disks" application from the Start Menu, under the "Accessories" category. [](https://hub.subspace.services/uploads/images/gallery/2025-02/invimage.png) This application can be used to configure the file path used to mount the hard drive, as well as ensure that it will automatically be mounted each time the computer is started.This application is being run as Root and has the potential to break your Debian install if you aren't careful.
There are currently two disk drives installed into this computer; an SSD for the operating system, as well as an external hard drive for media storage. For this example, we will be changing the mount location for an external USB hard drive to the /mnt folder. We can select the drive from the sidebar and we will be able to inspect all of the partitions on this drive. [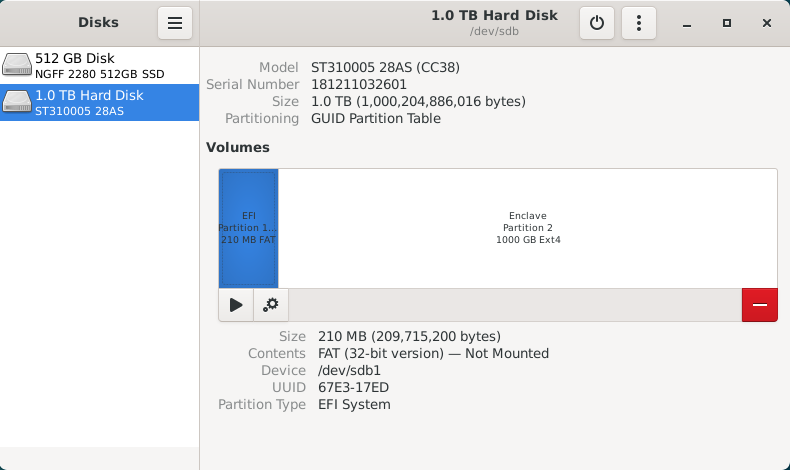](https://hub.subspace.services/uploads/images/gallery/2025-02/EYmimage.png) This drive has a small 210MB EFI partition, which stores system information, as well as a primary 1000GB data partition named "Enclave". We will ignore the EFI partition because it should not be mounted. For continuity, we will be mounting the Enclave partition at "/mnt/enclave". First, we need to select the Enclave partition, then click the gear icon to bring up the "Additional partition options" menu. [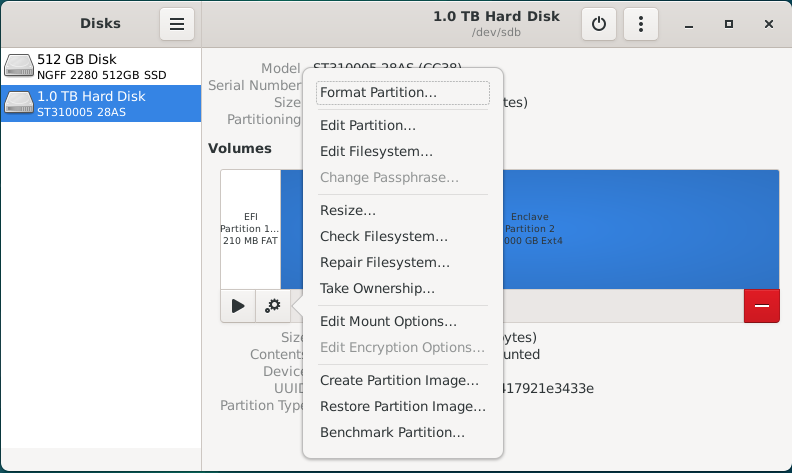](https://hub.subspace.services/uploads/images/gallery/2025-02/VIrimage.png) Once this menu is open, select "Edit Mount Options..." to bring up a screen that will let us configure how the operating system will handle mounting this disk drive. As you can see, the operating system has opted to use the "User Session Defaults" which will mount the USB hard drive within /mnt using a name based on the hard drives model number. [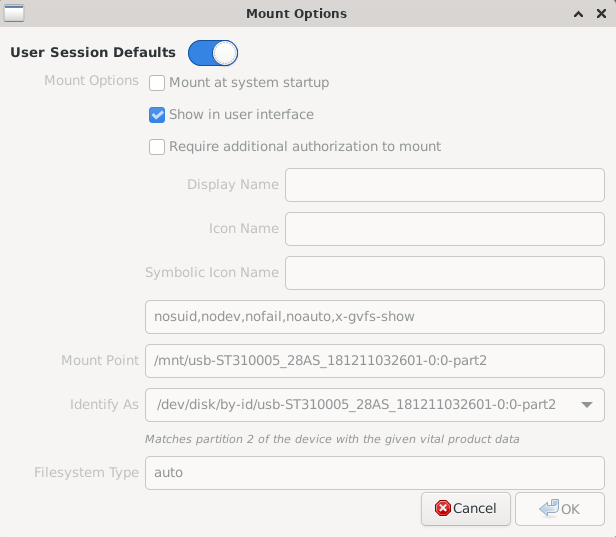](https://hub.subspace.services/uploads/images/gallery/2025-02/3RHimage.png) Deselect the "User Session Defaults" option and you will be able to change these settings. We want to ensure that the "Mount at system startup" and "Show in user interface" option are selected. Next, we will be changing the Mount Point to '/mnt/enclave'. Finally, we will be changing "Identify As" to the option that begins with "/dev/disk/by-uuid/\*". Each hard drive has a [Universally Unique Identifier](https://en.wikipedia.org/wiki/Universally_unique_identifier) that does not change and will ensure that the correct drive is always mounted at the correct location. [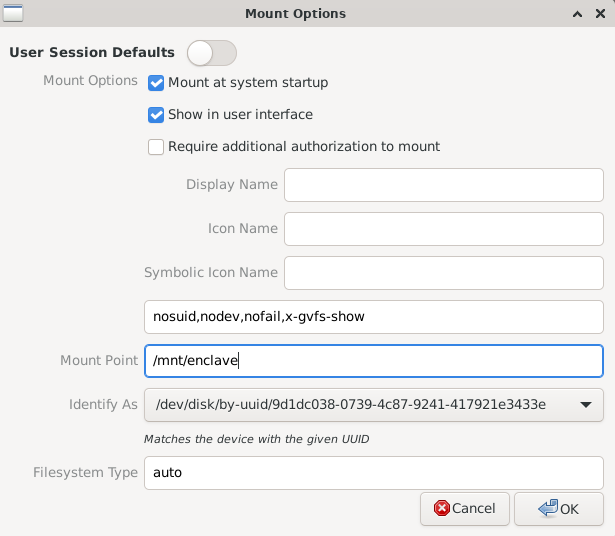](https://hub.subspace.services/uploads/images/gallery/2025-02/8Nximage.png) Once we hit OK, the software will commit these changes to the /etc/fstab – or [File Systems Table](https://en.wikipedia.org/wiki/Fstab) – file. This is a core operating system file that handles the mounting of both local and network drives during the boot process. As we can see, the hard drive we've just finished configuring hasn't been mounted for use yet. [](https://hub.subspace.services/uploads/images/gallery/2025-02/1P3image.png) Now we need to hit the "Play" icon labeled as "Mount selected partition" to make it available for use. This will mount the hard drive on your desktop, within the file browser, and the configured "/mnt/enclave" path. [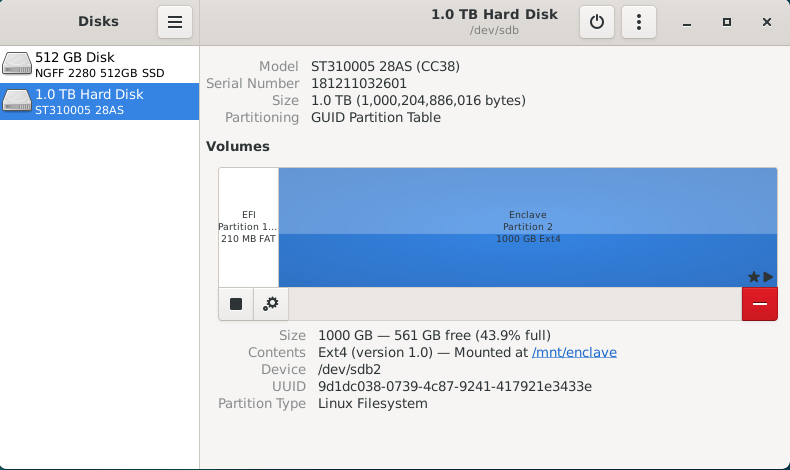](https://hub.subspace.services/uploads/images/gallery/2025-02/L0Timage.png) Next, we can close the Disk Manager. This should bring our terminal window back up. We can run the following command to ensure the data stored on it is accessible to everyone on the local computer: ```bash sudo chmod -R 777 /mnt/enclave ``` You can now navigate to "/mnt/enclave" in the file manager to verify that the directory is accessible. You may want to attempt creating a new folder through the File menu or by right-clicking on the empty space and selecting "New folder". [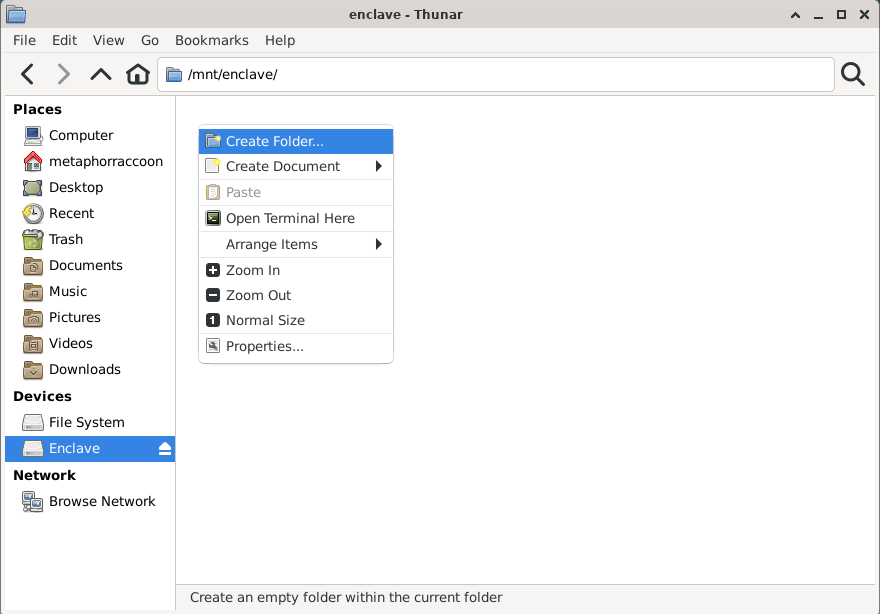](https://hub.subspace.services/uploads/images/gallery/2025-02/ZP1image.png) If you are able to create a new folder, then your new hard drive is setup and ready for use. You can now delete this folder. [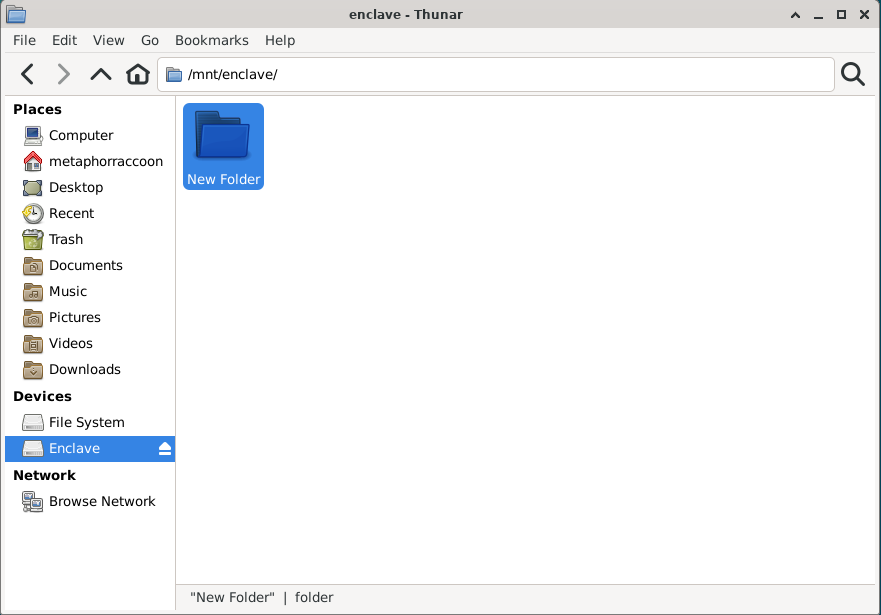](https://hub.subspace.services/uploads/images/gallery/2025-02/03yimage.png) # Graphics Card The Debian operating system comes with innate support for many AMD, Nvidia and Intel graphics hardware. Depending on the manufacturer, the open-source driver's hardware integration and functionality can be limited until proprietary drivers are installed.Skip this step when using a Raspberry Pi.
## AMD/ATI [](https://hub.subspace.services/uploads/images/gallery/2025-02/1000006175.jpg) Modern AMD graphics (2015 or later) are fully supported and run stable out-of-the-box using the [open-source AMDGPU software maintained by Debian](https://wiki.debian.org/AtiHowTo). AMD provide their own proprietary drivers, but they can [cause system instability](https://wiki.debian.org/GraphicsCard) and should be avoided. ## Intel [](https://hub.subspace.services/uploads/images/gallery/2025-02/1000006177.jpg) Integrated graphics, like those found in Intel processors since 1999, are fully supported and run stable out-of-the-box using [X.org's Intel Graphics Driver](https://www.x.org/wiki/IntelGraphicsDriver/). While [older models require a different driver](https://wiki.debian.org/GraphicsCard#Intel), they are still fully supported. ## Nvidia [](https://hub.subspace.services/uploads/images/gallery/2025-02/1000006178.jpg)Nvidia graphic drivers are partly closed-source and privately owned by Nvidia.
Debian can support basic features with most Nvidia graphics card using the open-source [Nouveau Driver](https://nouveau.freedesktop.org/) maintained by freedesktop. This driver has limitations though and may not perform optimally under some conditions. Media applications like [Plex](https://hub.subspace.services/books/media-servers/chapter/plex "Plex") or [Jellyfin](https://hub.subspace.services/books/media-servers/chapter/jellyfin "Jellyfin") require the proprietary Nvidia drivers to be installed on your system. They are also required for [connecting your graphics card to the Docker engine](https://hub.subspace.services/books/software/page/graphic-card-integration "Graphic Card Integration") for use by services. Before you can install the proprietary Nvidia drivers, you need to ensure which graphics card you have and [which driver versions are supported](https://us.download.nvidia.com/XFree86/Linux-x86_64/535.183.01/README/supportedchips.html) for your card. Newer cards work with the unified driver, while legacy cards are supported through specific driver release versions. This can be a finicky process. Debian [provides instructions ](https://wiki.debian.org/NvidiaGraphicsDrivers#Debian_12_.22Bookworm.22)for how to install the Nvidia graphics card drivers. Alternatively, you can use the [nvidia-detect script](https://wiki.debian.org/NvidiaGraphicsDrivers#nvidia-detect) to identify and install the correct drivers. # Networking We need to set a static IP for our server so that we can always access it from the same address.Your server should be plugged in directly to the router with a Cat6 Ethernet cable.
Before we do this, we should verify our current internet connection settings and write down some important details for later. We need to know the computer's current local network IP address and the address for our internet gateway. ## Collecting Information First, we need to install a utility that can quickly output this information for us: ```bash sudo apt install -y net-tools ``` ### Default Network Device Once this completes, we will need to run a command to find out what our default network device is: ```bash ip -o route show | grep default | perl -nle 'if ( /dev\s+(\S+)/ ) {print $1}' ``` This will return the device name about our default network interface which should be our wired connection.You may want a piece of paper to write down notes.
[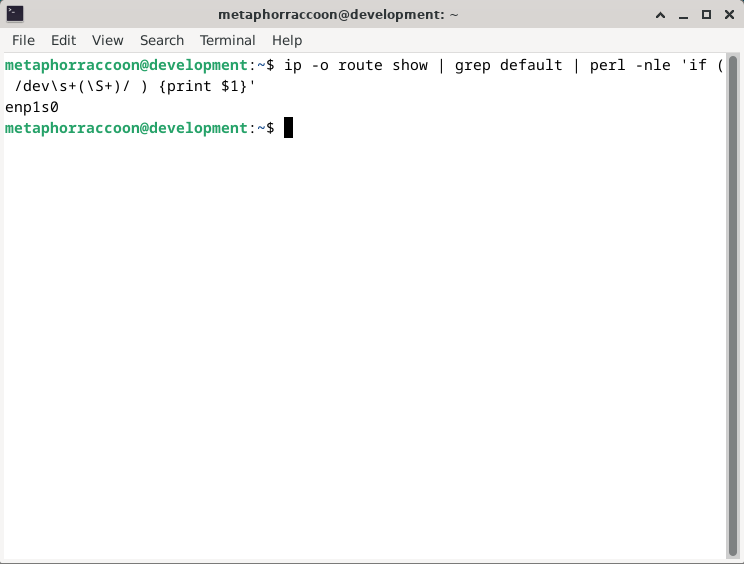](https://hub.subspace.services/uploads/images/gallery/2025-02/CmOimage.png) This shows that our default network interface is named **enp1s0**. Write this down for later.| **Network Device** | enp1s0 |
| **Network Device** | enp1s0 |
| **Gateway** | 192.168.68.1 |
| **Network Device** | enp1s0 |
| **Gateway** | 192.168.68.1 |
| **IP Address** | 192.168.68.100 |
| **Netmask** | 255.255.252.0 |
| **Network Device** | enp1s0 |
| **Gateway** | 192.168.68.1 |
| **IP Address** | 192.168.68.100 |
| **Netmask** | 255.255.252.0 |
| **DNS servers** | 1.1.1.1, 1.0.0.1 |
Reboot the computer to ensure everything is working as intended.
### Verify Connection After restarting your computer, open up the terminal. We will now run two commands to ensure the internet is working and we have the correct local IP address. ```bash ping -c 5 1.1.1.1 ``` This will ensure that our computer has access to the Cloudflare DNS server. We will consider the test has passed if the command reports '0% packet loss'. [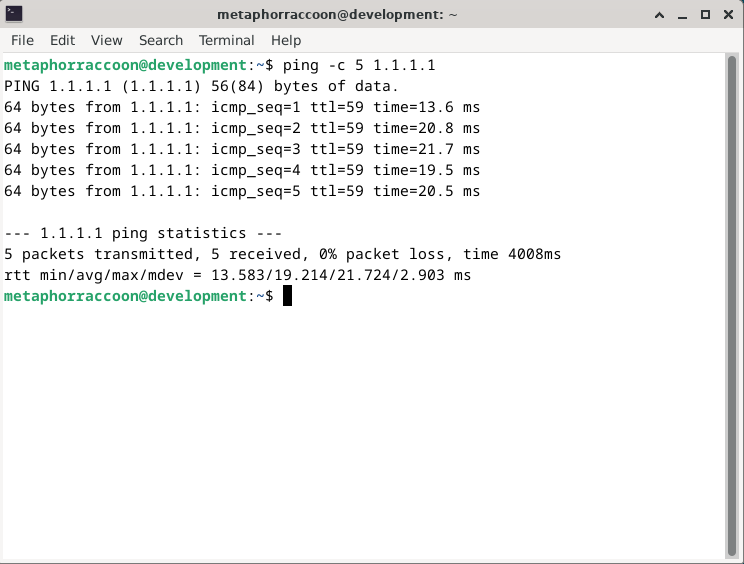](https://hub.subspace.services/uploads/images/gallery/2025-02/XdRimage.png) We can now run one final command to verify our computer is using the static IP address we configured: ```bash ip -o route show | grep default ``` This will show an overview our default internet connection and we can see that it is now labeled as a 'static' connection. [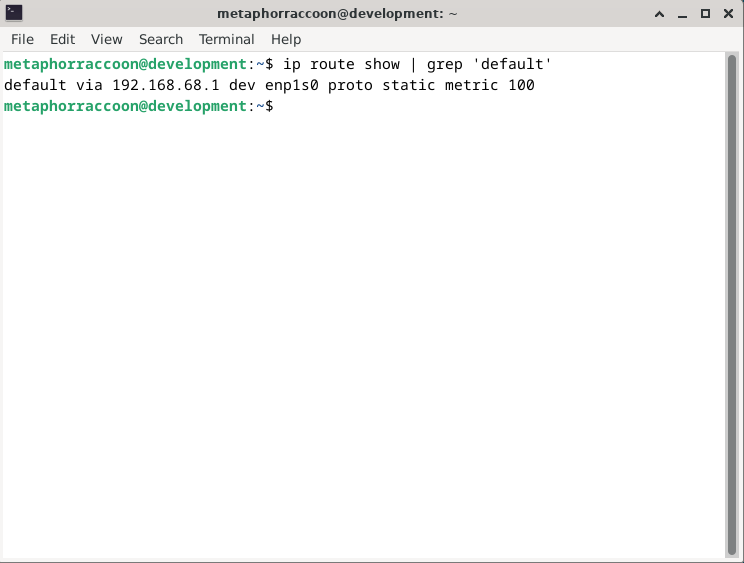](https://hub.subspace.services/uploads/images/gallery/2025-02/rzDimage.png) You now have a computer with a static IP address that will always stay the same.