
Creating Your First Container
We will be installing Portainer, an open-source web application that makes it easy to manage Docker from your browser.
Starting Portainer
We are adding port 9000 which isn't used by default. This allows Portainer to be accessed through HTTP instead of HTTPS.
You can find the official Portainer installation guide on their website.
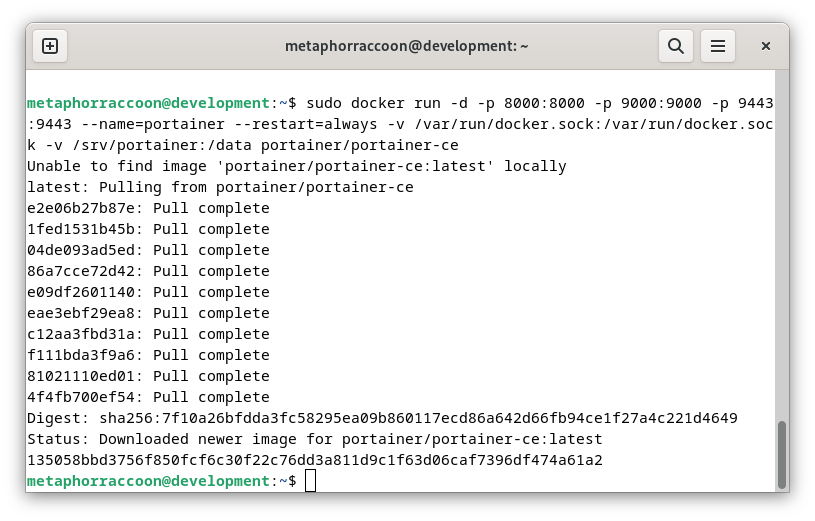
Using the terminal, we will issue the command to start our new Docker container:
sudo docker run -d -p 8000:8000 -p 9000:9000 -p 9443:9443 --name=portainer --restart=always -v /var/run/docker.sock:/var/run/docker.sock -v /srv/portainer:/data portainer/portainer-ceDocker will download the image and start the container.
 Once the command has finished, we can verify that Portainer is operational by querying Docker's running containers:
sudo docker ps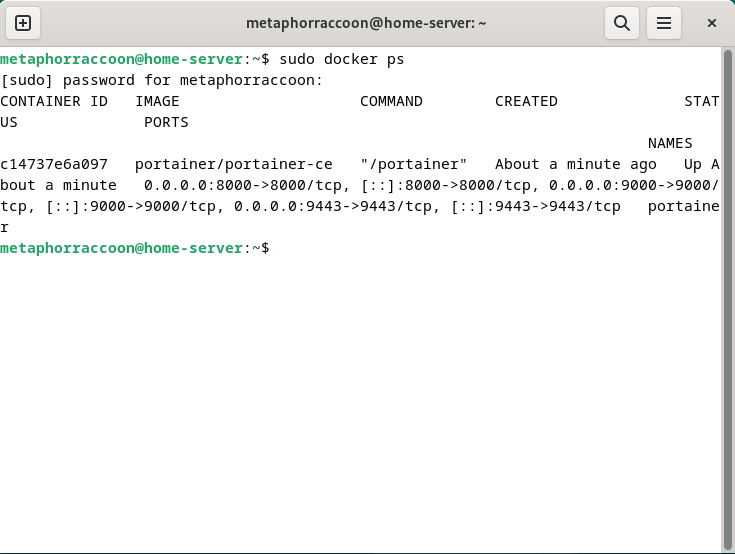
The command should return our running Portainer container and show that it's available under four different ports.
Creating an Admin Account
In order to configure our instance of Portainer, we will need to open a web browser.
We recommend Mozilla Firefox, but Google Chrome will also work.
Once the web browser is open, go to http://localhost:9000/ to load Portainer.
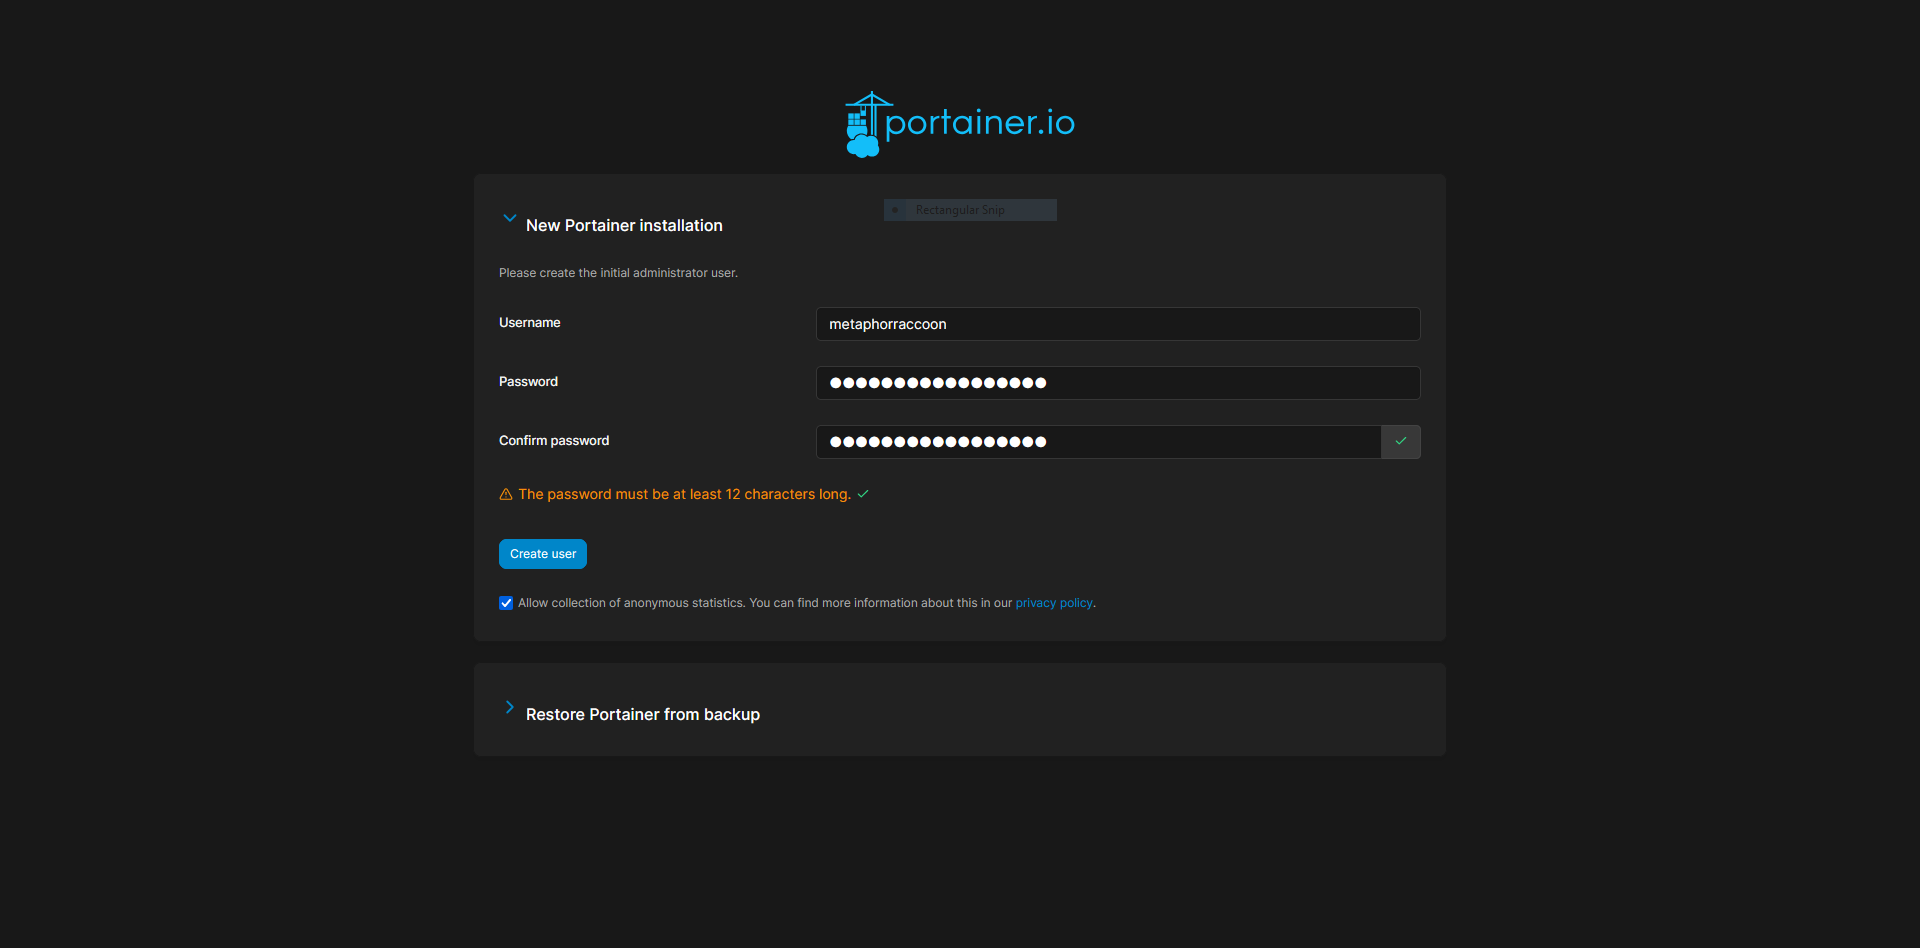
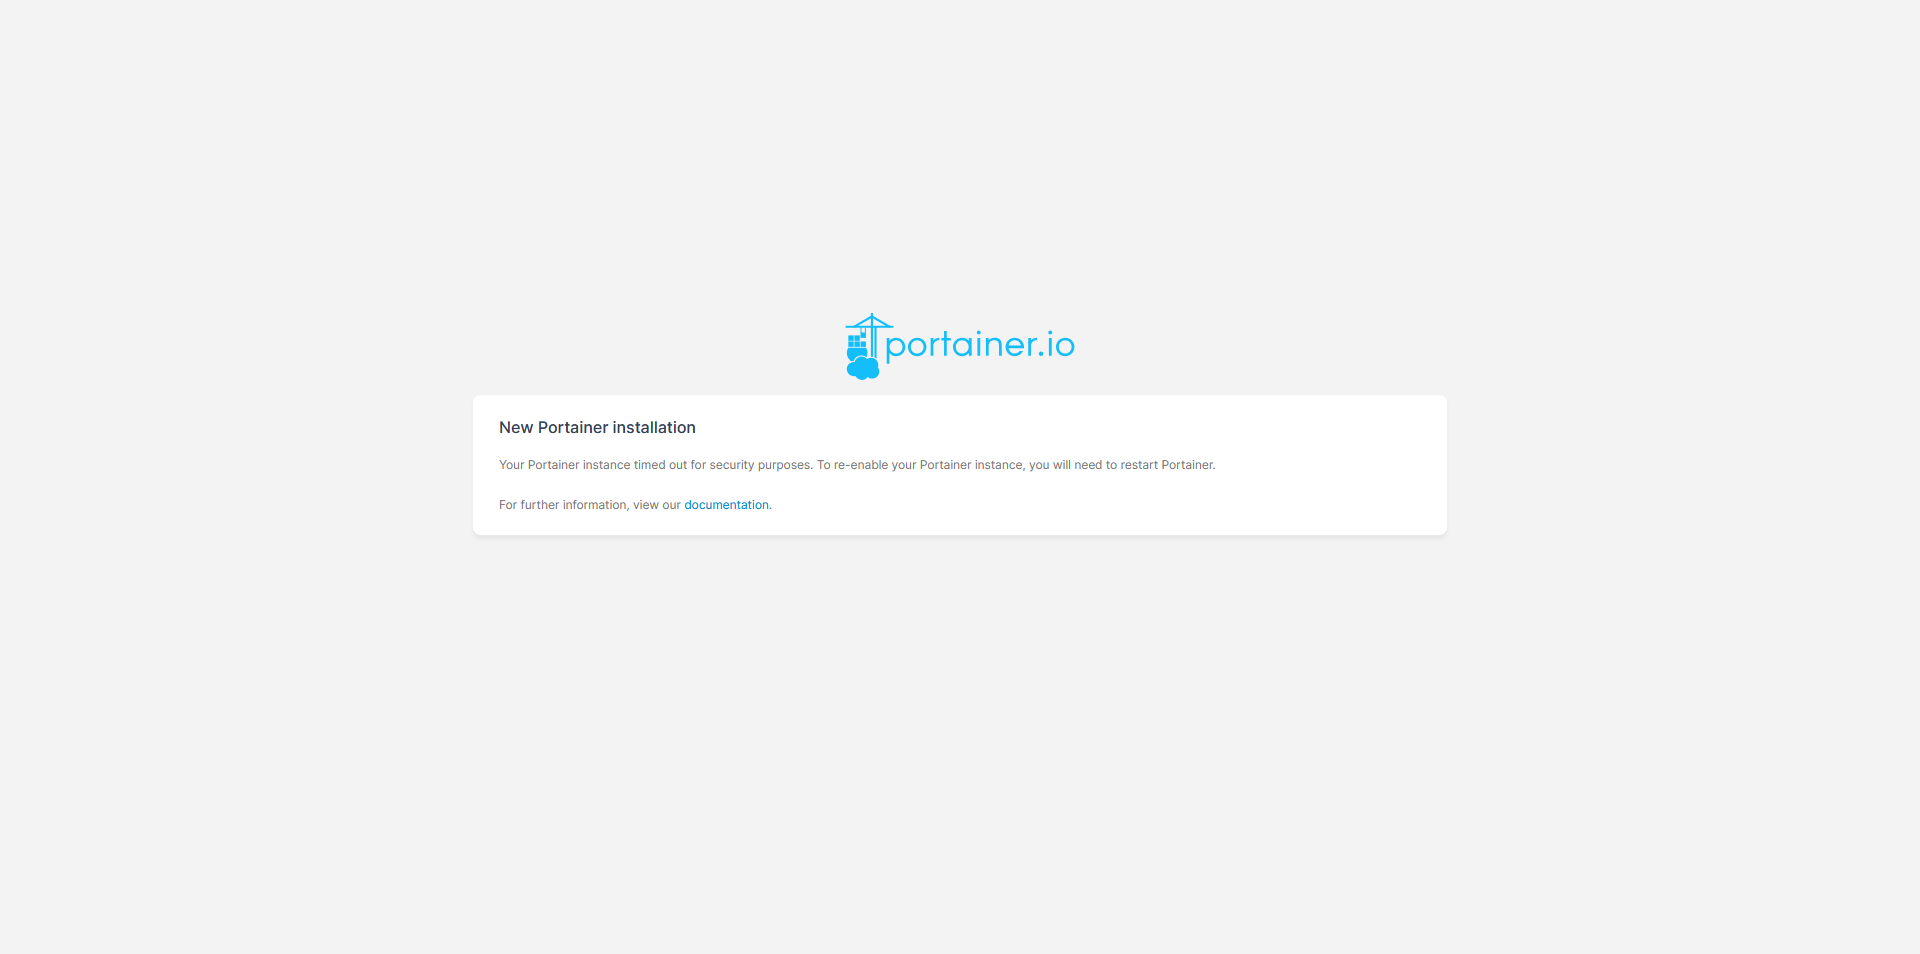
Here, we are instructed to create an administrator account and set a secure password. This will be used in the future to login to Portainer.
The account creation wizard will time-out if not completed quickly.
If this happens, restart Portainer with the command: docker restart portainer.
Adding Docker
Once we have created an account, we will be able to select our Docker service. If everything is working as expected, you should be able to click 'Get Started' to use the local Docker service.
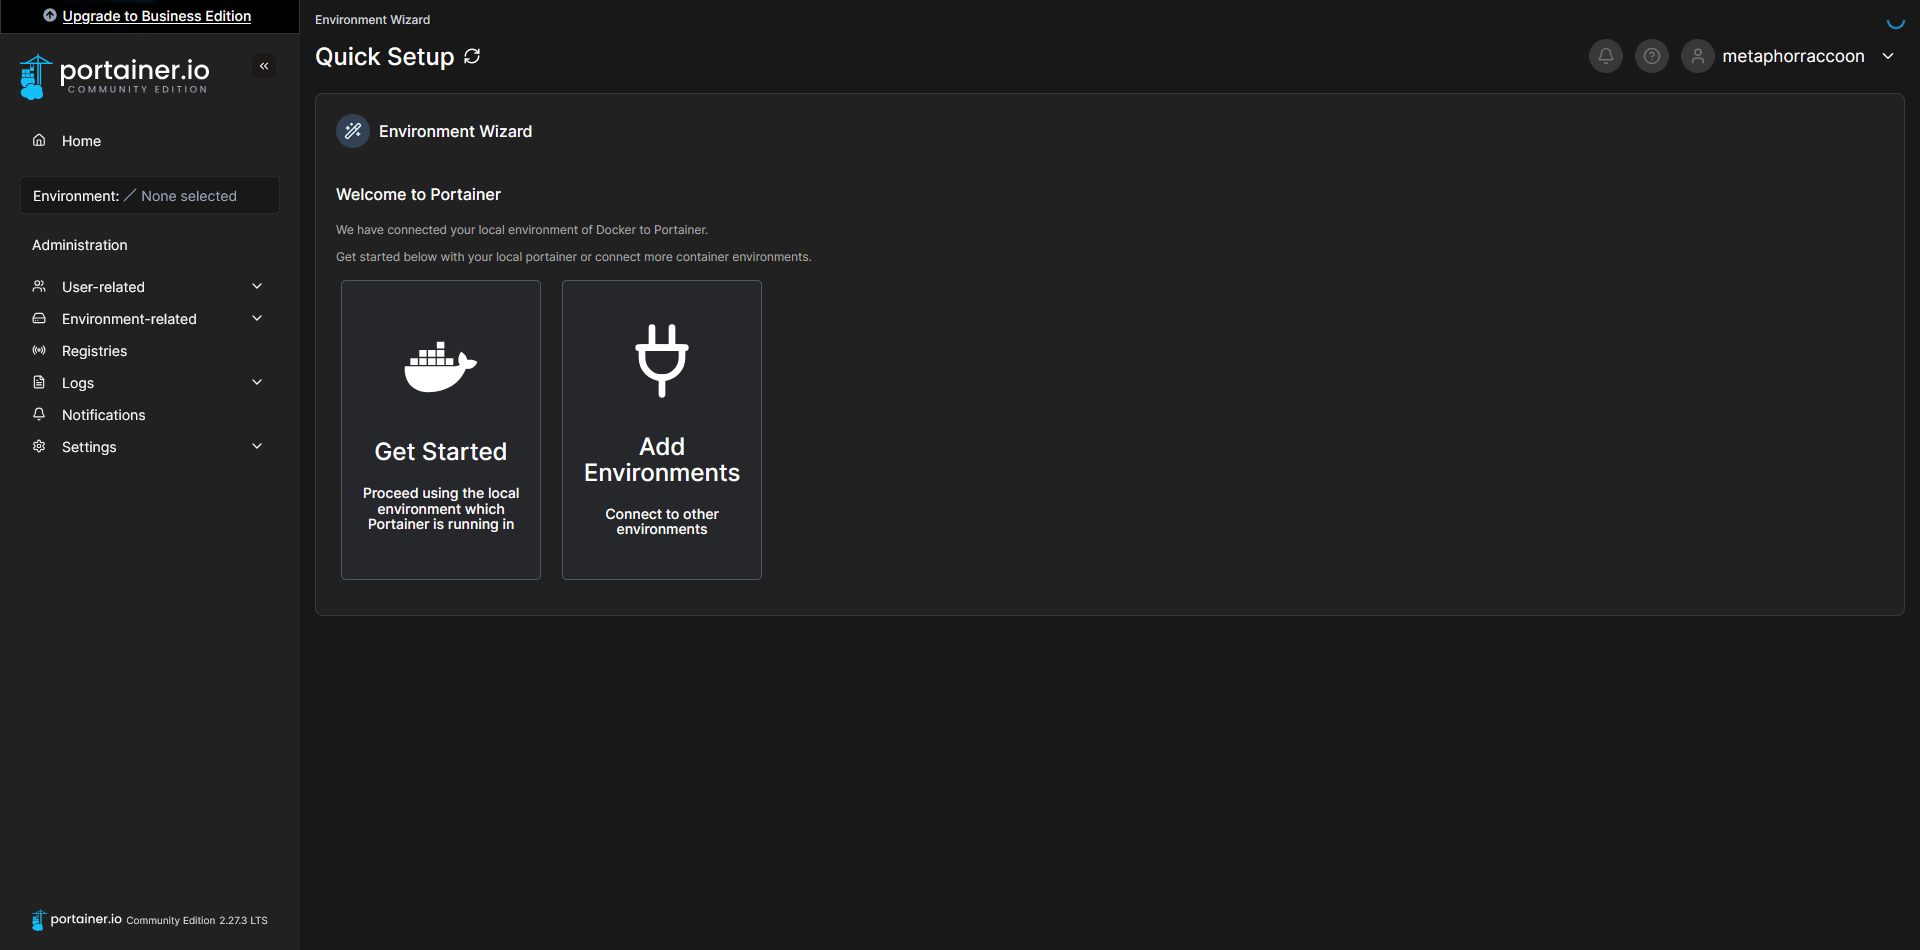
This will bring you to a list of Docker installations that are available to Portainer.
You can use the Portainer Agent to control Docker on additional servers.
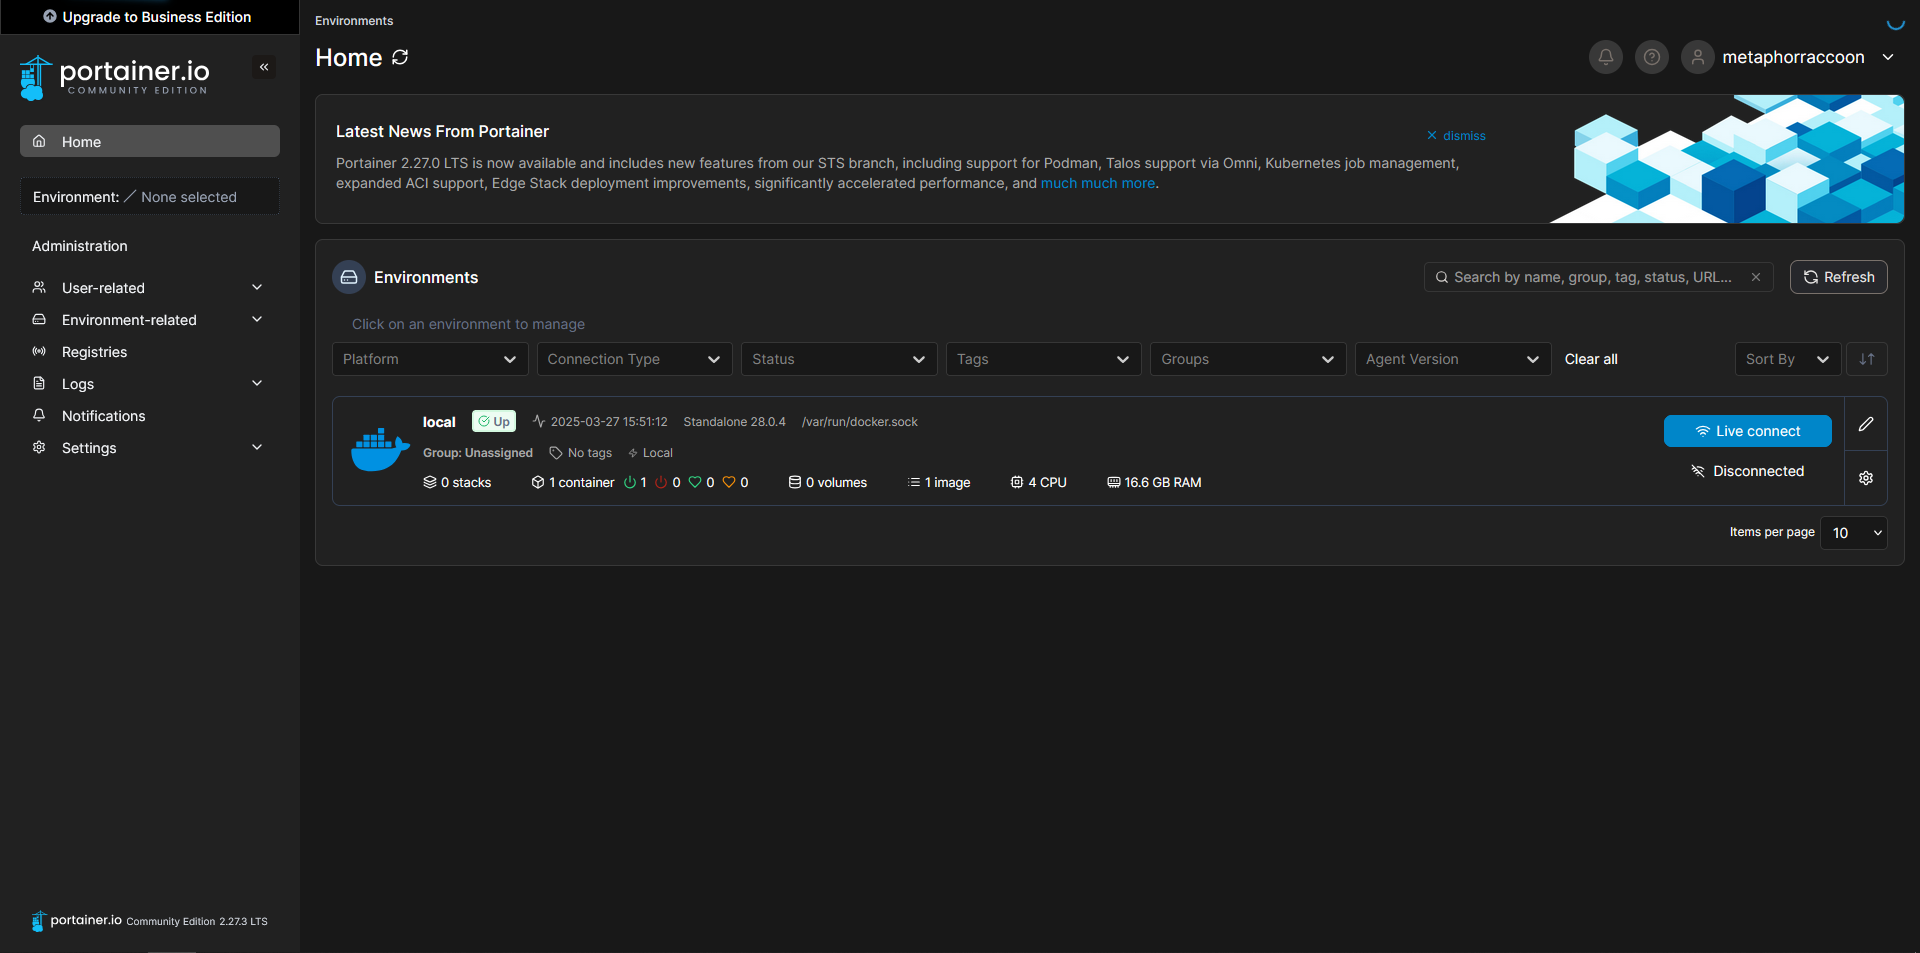
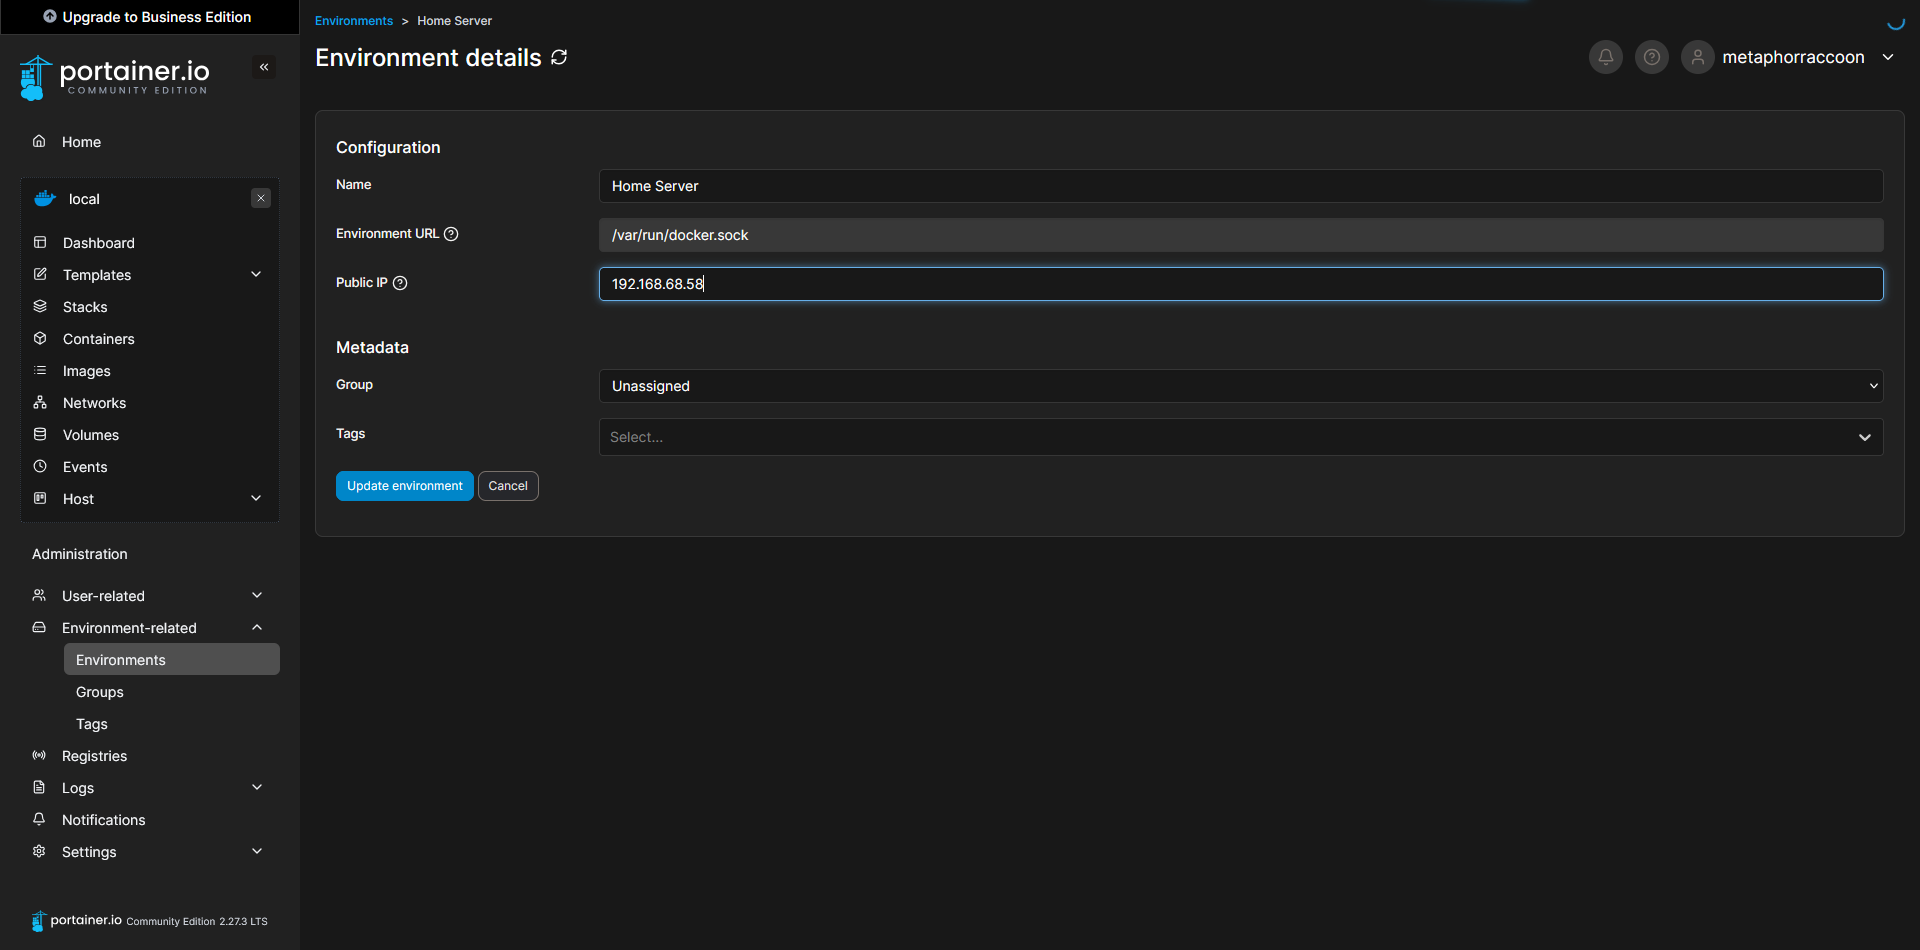
Now, we can configure the name of our Docker server, for personal preference, as well as set the root IP address of our server so we can quickly access our services from Portainer. Select the pencil icon next to your "local" Environment.
If you are unsure about the LAN IP address we selected earlier, you can run the command below to obtain it:
ip -o route show | grep default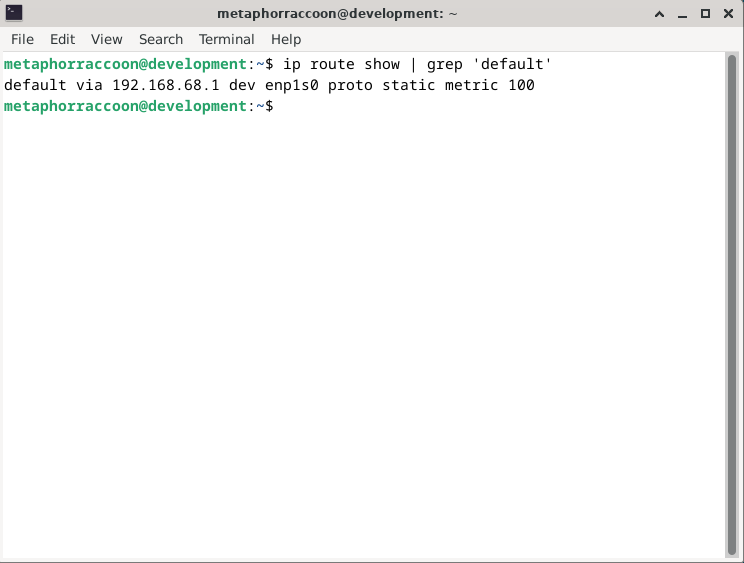
Once you have completed that, you can save the settings to apply them. When returning to the home screen, we can see that our settings were updated.
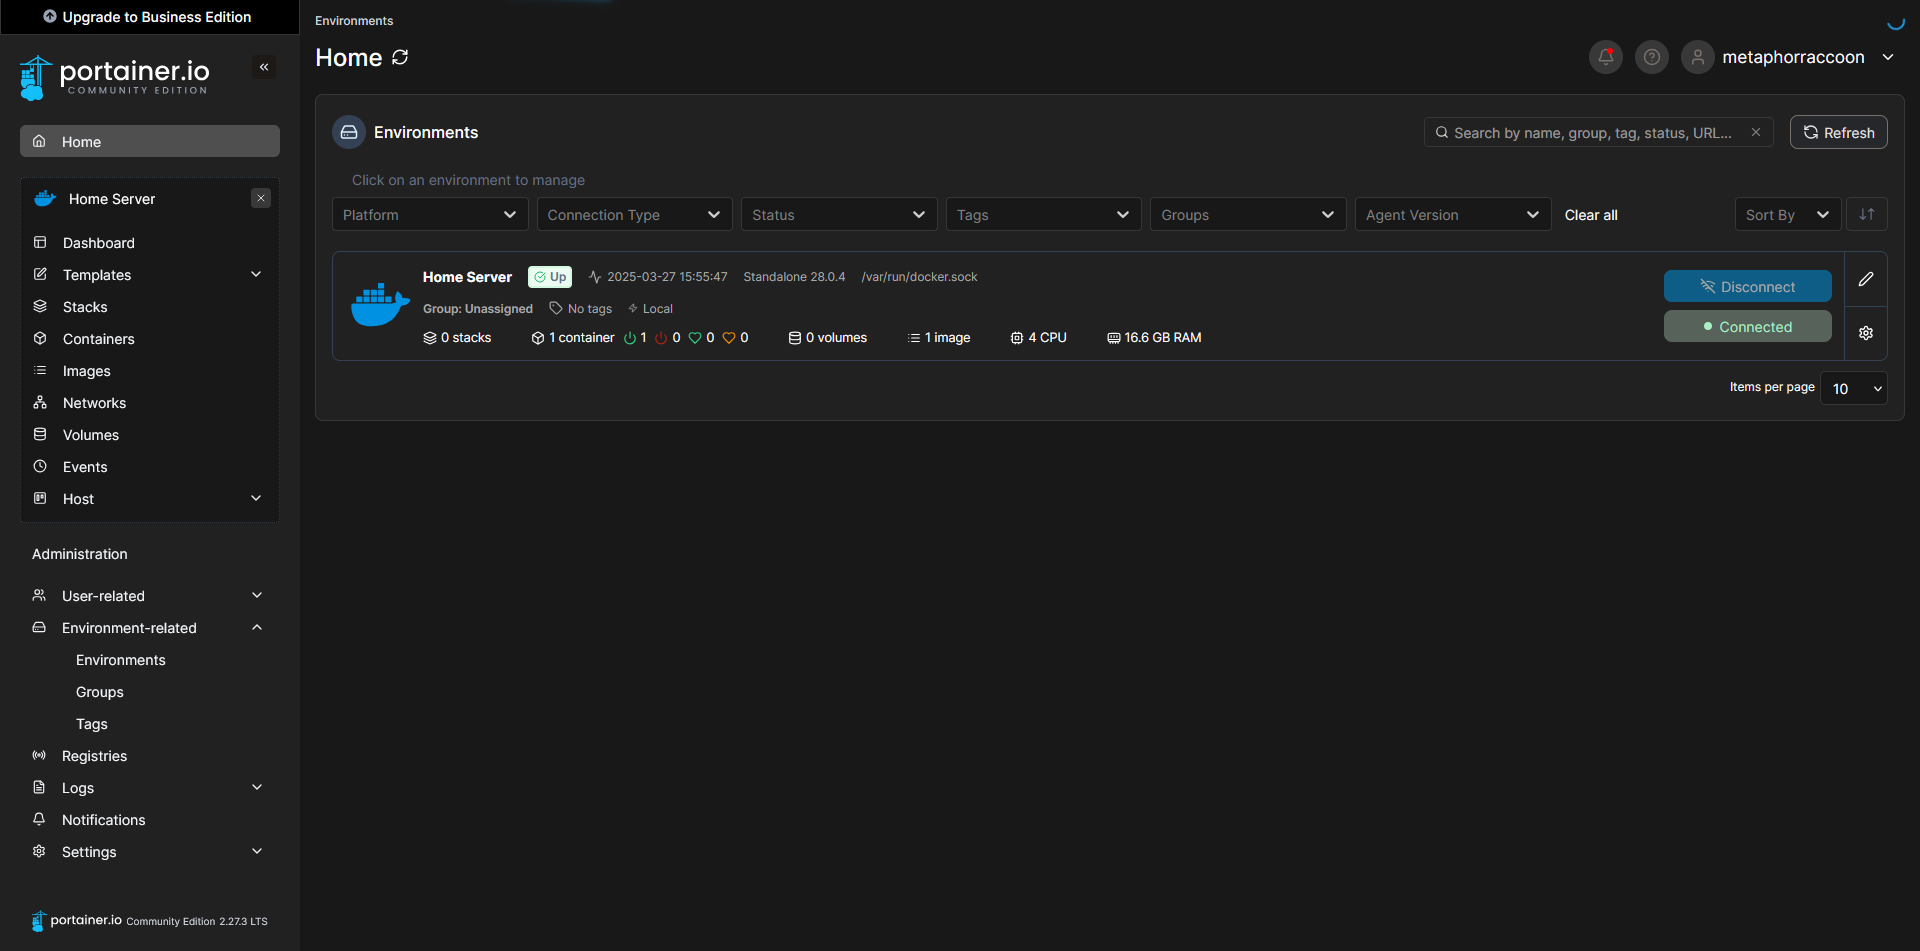
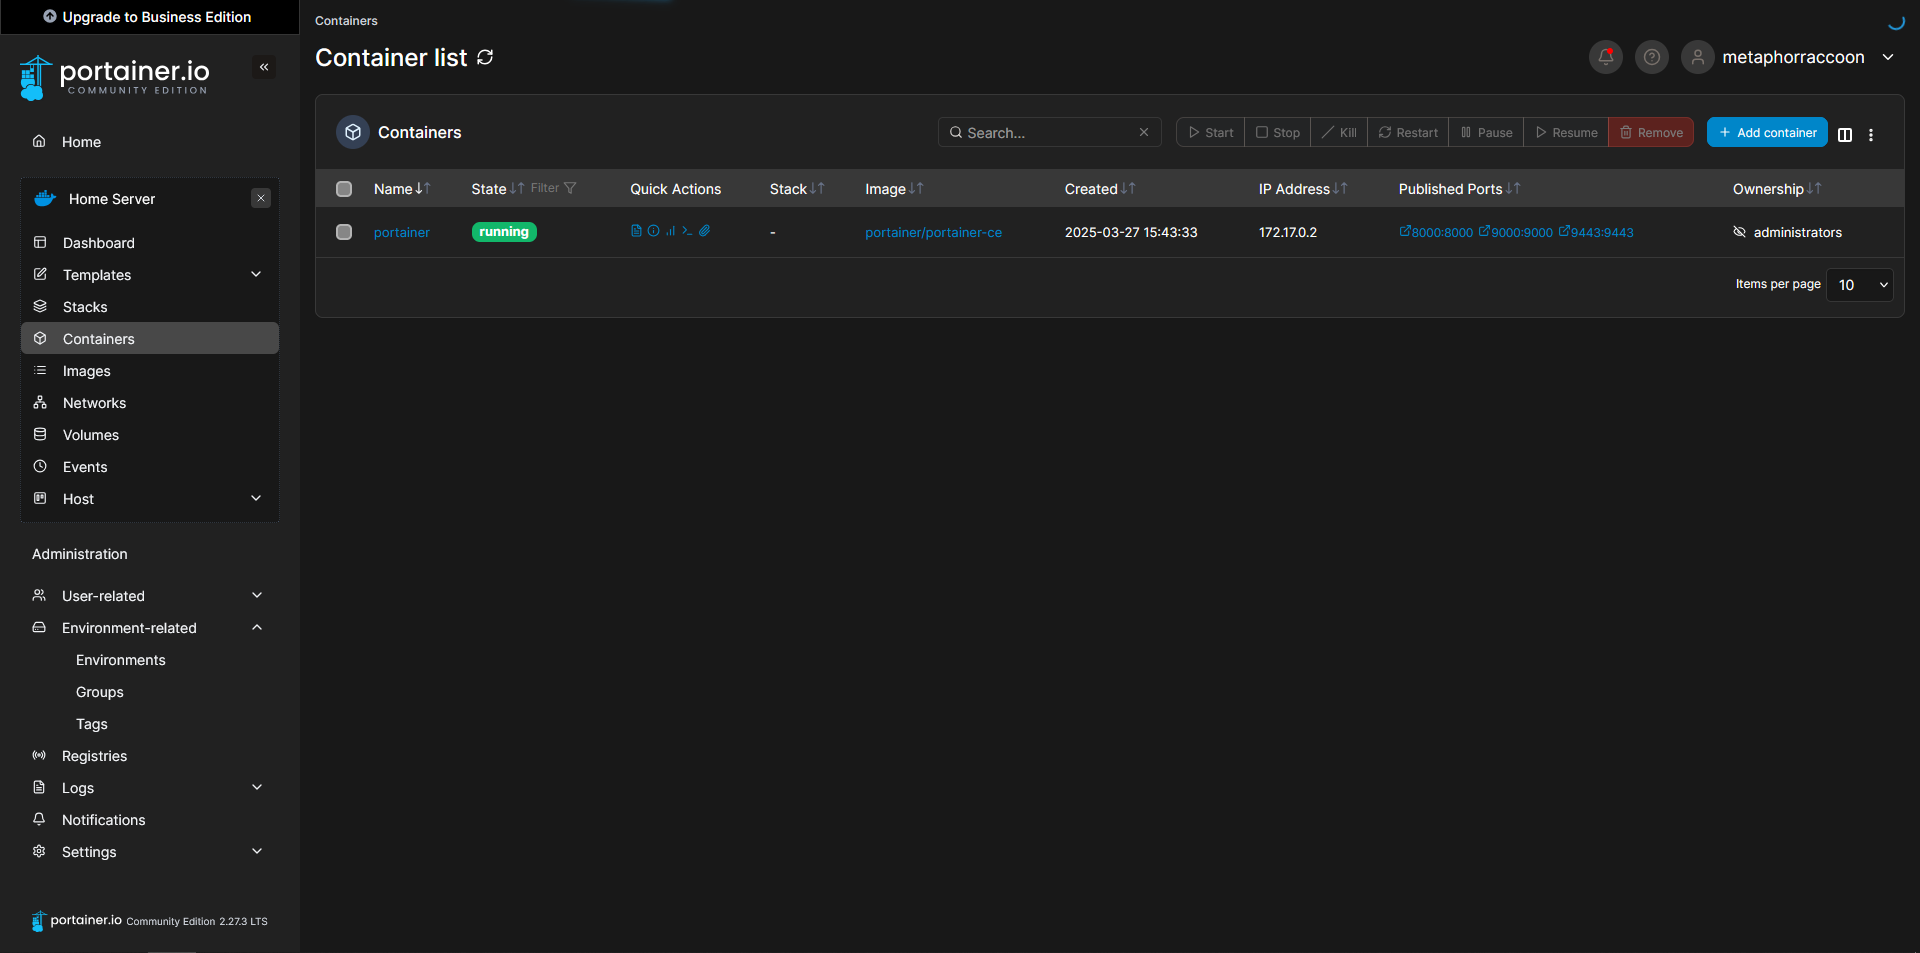
Clicking on our Docker environment – named "Home Server" here – will pull up a list of our running containers. You can see the first and only one listed is our newly created Portainer installation.
Clicking on "8000:8000" under assigned ports will open this port using your web browser. In this instance, it should open Portainer in a new tab.